All about those Rutabaga Fries


This early spring meal was a must to share. I was inspired by all the luscious root vegetables at the Roslindale Winter Market. Golden rutabaga fries are my new favorite food.

Ponzu Glazed Baked Salmon, Roasted Rutabaga Fries, Water Melon radish salsa and avocado. 

  • Peal rutabaga and slice into fry shapes. Toss in olive oil and salt and pepper, coating evenly. Roast at 425 for about 45 minutes until the edges are getting some char.
  • Water Melon radishes peal and julienne into little sticks. Finely dice half a sweet onion. Toss in rice vinegar, evoo and salt and pepper.

Advertisement

Easy Fermentation!

 Image


 I attended a workshop on fermentation of winter storage crops last weekend and I’m diving in with both feet. What a fantastic and simple way to preserve the root vegetables, cabbage and winter greens you might be tired of eating right about now. I’m already a convert to the health benefits of eating and drinking (Kombucha) fermented foods with all their healthy probiotics.  I recommend reading about it more if you are new to the idea. Kimchi is of course the most famous fermented vegetable condiment and you can also just be making these for the taste.

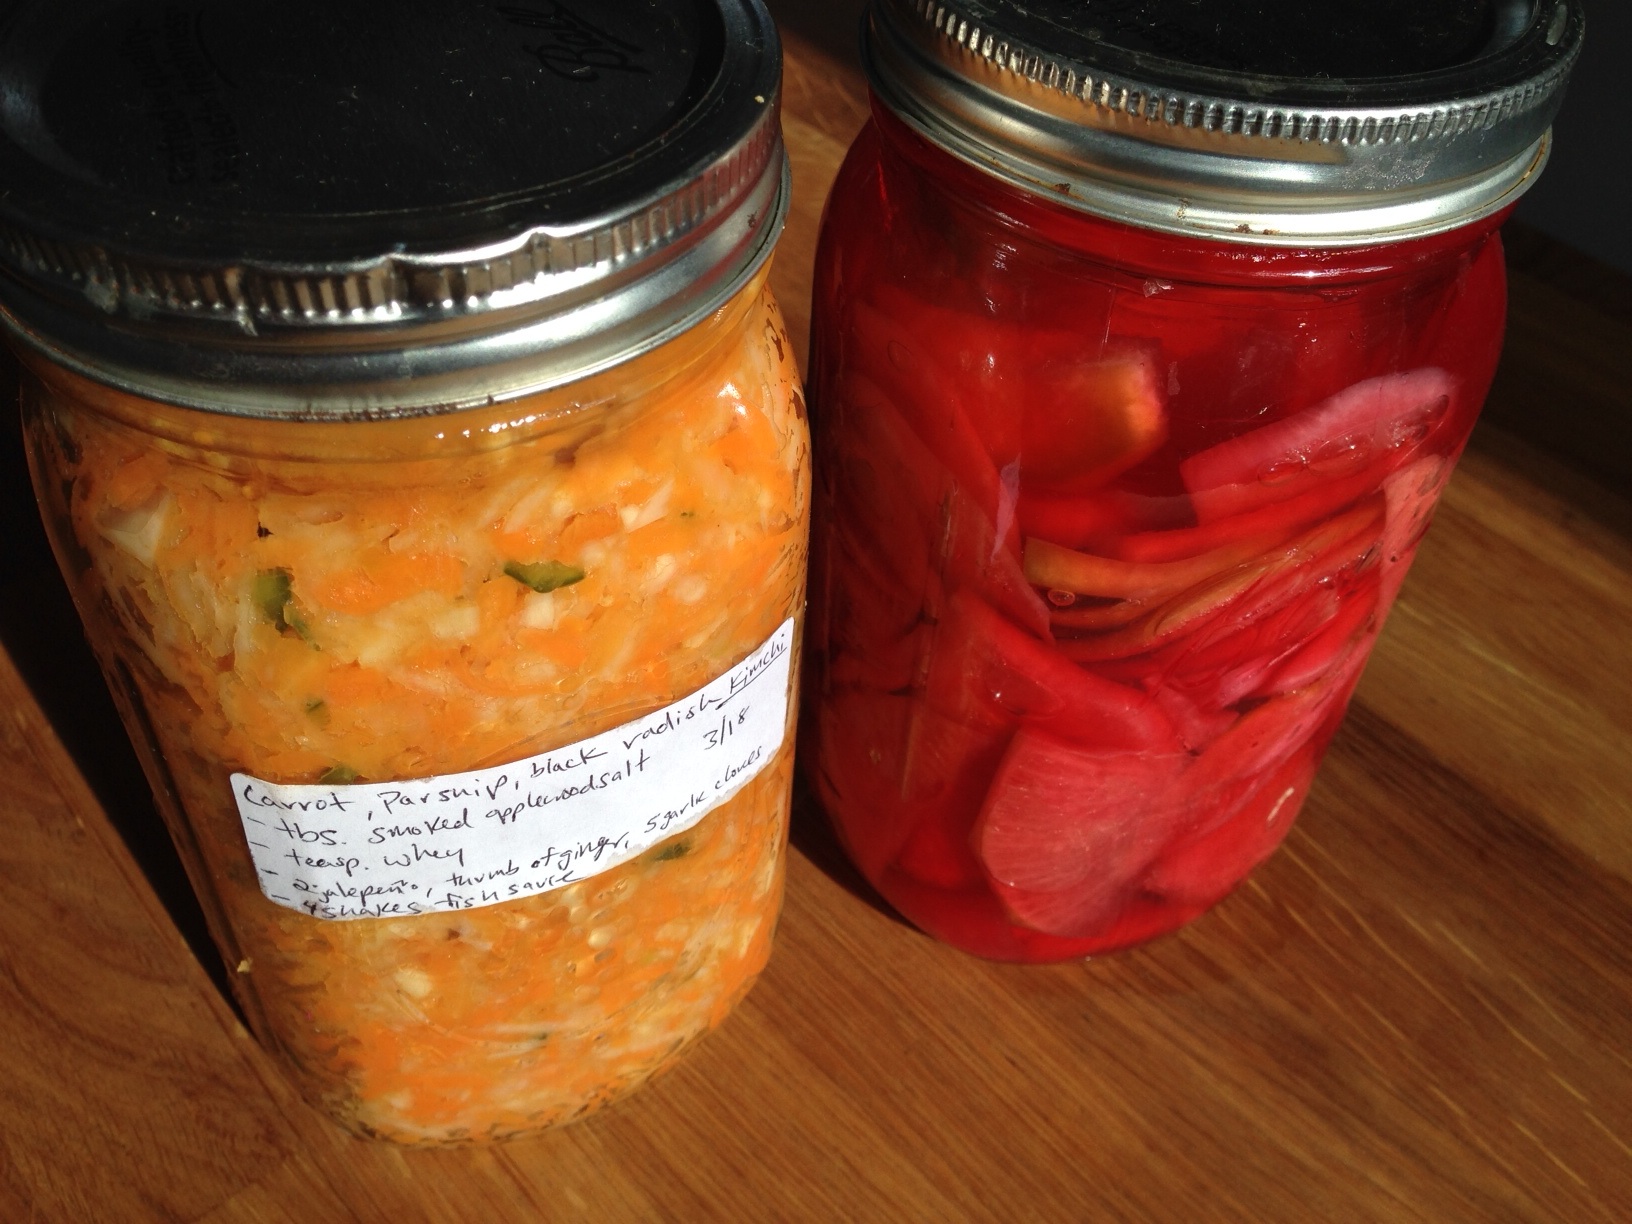
I’ve got sliced water melon radish and carrot, parsnip, black radish “Kim Chi” going right now. 
The Basics:
-Sliced chucks of vegetables need to go in a brine, grated and finely shredded vegetables are massaged with sea salt and release their own juices to then make the liquid needed for fermentation. 
– Brine = 1 tablespoon of sea salt to quart of water and 1 tablespoon of yogurt whey. Plus anything you want to add for flavor.
– IMPORTANT – Tap water used to make brine must be left out 24 hours so that the chlorine will off gas. Otherwise the chlorine will kill of the probiotics you wants to form.
-The liquid whey from your organic plain yogurt helps as an additive when making a brine to get the healthy bacteria going.
-1 Quart Jar = 2lb shredded veg  = 1 Tablespoon sea salt
This is a somewhat low salt approach and even lower salt content can be used with the addition of a Tablespoon of the yogurt whey.
-Yogurt whey also helps with high sugar content vegetables like beets and carrots, that can tend to go to fast into alcoholic fermentation.
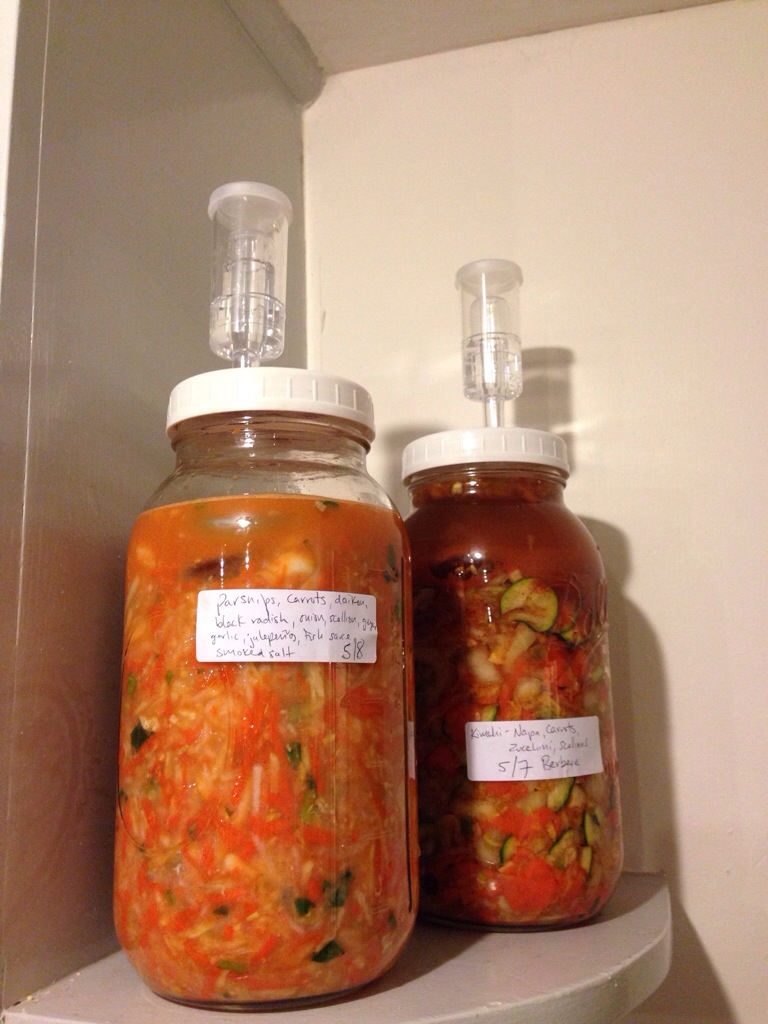
– Pack very tightly with fist into jar so that all air bubbles are pushed out – no oxygen is the key to growing the healthy bacteria only. Put the lid on jar somewhat loosely. Use a glass weight or a small glass jar to help keep vegetables pressed under the liquid, although not nessesary. I’ve just been checking my liquid level every couple of days.
-Put away in a corner where it’s 60-70 degrees, on a tray to catch liquid that will bubble out. Most vegetables are done in 7-10 days . Taste daily to see if it’s “done” for your tastes. 
-Always make sure everything is submerged under liquid, mold will form on anything that is allowed to touch oxygen. That mold can just be scraped away and you can keep going.
– A tip for keeping chunks of vegetables crisp in this process is adding a grape or oak leaf.
For “Kim Chi” Style condiment I grated two pounds of mixed carrots parsnips and black radish, added 2 diced jalapenos, a big thumb of diced ginger, 5 cloves of garlic, 4 shakes of fish sauce and 1 healthy tablespoon of Applewood smoked sea salt.
Massage the veg, minus the hot peppers until lots of liquid has releases, about 5 minutes. Add in the hot peppers and pack into your jar. 
A clean jar is necessary but no stealization is needed as in canning. A great use for reusing jars.
A recommended book on the topic is Wild Fermentation by Sandor Ellix Katz


20140511-191147.jpg

Exploring Gluten Free Cheddar and Scallion Scones

20130516-123259.jpg
Here we are, 2013, and my husband just figured out that years of gastro issues is relieved with eliminating wheat from his diet. OMG. Dietary restrictions in my own home ! Mostly I’ve decided to just eliminate those pesky wheat products, as the imitation ones just don’t measure up. Instead of bread he gets seasoned rice, potatoes, corn tortilla or some other grain mix.
But I do have to give gluten free baking a shot- to see if I can come up with something that is good even if you don’t have to eat gluten free. These were pretty tasty. Scallions are going crazy in the garden right now and you could use whole wheat pastry flour too.

20130516-124252.jpg
3 Cups Bob’s Red Mill Gluten Free All Purpose Baking Flour
Plus extra flour for dusting.
1 Tablespoon sugar
1 teaspoon baking soda
1 teaspoon salt
1 1/2 cup buttermilk or soured milk
( to sour milk put a tablespoon of cider vinegar per cup of milk and let stand at room temp for 10 minutes)
1 cup shredded cheddar
1 cup finely diced scallions or chives
To Do:
Oven to 425* – Cover cookie sheet with parchment paper.
In a large bowl whisk together dry ingredients. Mix in chives. Make a well in the center and add buttermilk / sour milk. Then add cheese.
Knead until it’s evenly moist. The gluten free flour makes this receipt wetter- so heavily flour your work surface. Transfer dough to floured surface, shape into oval and dust top with coating of flour.
Cut lengthwise and then into 14 triangles.
Place on sheet and bake for 20 minutes until golden brown.

20130516-125912.jpg

Nantucket Bay Scallops and Shrimp with Thai salsa and Sesame Egg Noodle

20130305-104300.jpg
I wanted to buy some of these precious Nantucket Bay scallops and use my new bottle of Lime Ponzu. The rest was what I happen to have in the house and it actually worked out very tasty. These scallops are pretty pricy, so I used a 1/4 lb of them and filled it out with some 26/30 shrimp and chili tofu slices. All briefly sautéed in olive oil, sea salt and fresh garlic.
I used some nice wide egg noodles tossed in toasted sesame oil as the base and in between my “Thai ” salsa that is nothing anyone from Thailand makes, but it has cilantro and lime.
Salsa :
One finely diced onion
Two diced red pepper
Three diced cubella peppers
One diced zucchini
Leaves of one bunch of cilantro-diced
Seasoned rice vinegar
Lime Ponzu

Beet Pickled Deviled Eggs

Having been served a beet juice pickled egg a couple of times I always wanted to try it myself. So when I boiled some beets this past week I reserved the beet juice in a large glass jar. Added equal parts apple cider vinegar and about a teaspoon of salt.
Let it sit 3-4 days in the frig and then check on them. I Deviled them with mayo and Sriracha chili sauce, then topped with a little diced Kim Chee. It was delicious !

20120717-182259.jpg